Common Roof Installation Mistakes To Avoid When Working on Your Home
Author: Dan Stout | July 25, 2023
Are you considering DIY-ing your roof installation or repair? While it's absolutely possible for a homeowner to install or repair their roof, it's important to take extra care to avoid the kind of mistakes that can turn your roof into a disaster. Doing your research is a must, and so is taking the necessary precautions so you don't end up with a roof that's more damaged than when you started. In the end, you might decide it makes more sense to go with a professional instead of taking matters into your own hands.
Here are some of the most common roofing mistakes made by inexperienced roofers.
Reusing Old Flashing
Many homeowners opt for DIY roofing repair in order to save money. Since they're in a money-saving mindset, it's natural for them to look for ways to cut back on material costs as well. As a result, many DIYers opt to reuse flashing rather than buy replacements.
Unfortunately, the long-term damage caused by reusing flashing (even when it appears undamaged) far outweighs the short-term savings. Reused flashing typically contains nail holes and uneven edges where the flashing bent and twisted during its removal and reinstallation. These flaws allow water easy access to your home.
This concern won't be an issue if working with a pro. A contractor won't think twice about putting new material on a roof because they're buying in bulk, and they understand that using new materials will make their job go faster and will be less likely to result in a call-back.
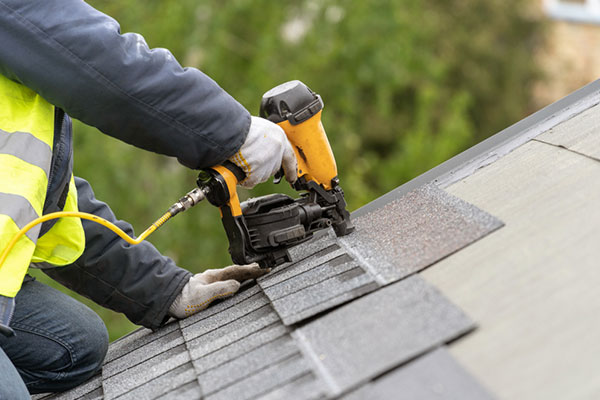
Incorrect Nail Pattern
All roofing material has specific requirements for how it should be fastened in place. While professional roofers have these nail patterns ingrained in their muscle memory, homeowners must learn them from scratch.
The most common nail pattern mistake is setting nails too high on the shingle. If a roof is overlapped and nailed correctly, each shingle is secured by a row of nails across its center and — when the next row is installed — a second row of nails across its top. The result is that each shingle is held firmly in place by two rows of nails, with no visible nail heads.
Improperly patterned nails can result in shingles curling or blowing loose. Even worse, an incorrect nail pattern typically voids the shingle warranty, meaning you'll need to pay out of pocket for any resulting damage.
Forgetting a Starter Strip
A starter strip is a flat, rectangular length of asphalt that sits below the first row of a shingle roof and along the eaves. It's not difficult to install, but far too many DIYers skip this step entirely.
Starter strips provide a level base for that first shingle row and also help protect against wind damage. But their primary purpose is to prevent water infiltration.
All shingles butt against the shingles to either side, resulting in a seam that water can trickle through. This isn't an issue higher on the roof, since any water that gets through the seam will hit the solid body of the shingle below and continue to flow down the roof. But the shingles at the eaves don't have that layer of protection. The starter strip is essential to shedding that last bit of water away from the home.
Forgoing a Drip Edge
A drip edge is an angled metal strip projecting past the roof, allowing water runoff to fall away from the home rather than wicking back into the sheathing. They also help defend against insects and ice dams. Drip edges have been required for asphalt roofs since 2012, per IRC R905.2.8.5.
Of course, the drip edge must not only be installed but it must also be installed correctly. The most common mistake made during installation is incorrect spacing, with either not enough of a gap between the drip edge and the fascia or not enough overlap on the roof, or not being installed correctly in relation to any ice guard membrane (this depends on the manufacturer's installation instructions).
Not Removing Old Shingles
In many areas, it's acceptable for homes to have two layers of asphalt shingles (often called a "roof over"). But, as in many areas of life, just because you can do something doesn't mean you should.
Always check the code where you live — in some municipalities, roof overs are illegal. In addition, covering an old roof without fixing any underlying problems is simply delaying the inevitable. You'll still need to make those repairs, but now it's twice as much work. In addition, roofs that have structural weaknesses may not be able to handle double the weight they're carrying. If you have questions about your roof's ability to support another layer of shingles, consult an expert.
Racking Architectural Shingles
"Racking" a roof refers to installing the shingles an entire row at a time, from eaves to ridge. By contrast, a "stair step roof" lays down the first row of shingles, then a portion of the second, a smaller portion of the third, and so on, resulting in a pattern that resembles a flight of stairs.
Three-tab roofs can be racked, while designer or architectural shingles should never be racked. For many shingle types, racking is not recommended because it can result in improper nailing, stress cracks and color mismatches.
There's a tremendous amount of installation information available online, and that's great! But it can also make it easy for DIYers to read about roof installation techniques that don't apply to their specific roof, leading to mistakes that could have big consequences. In many cases, it may be more cost-effective over time to have a professional install or repair your roof, as they have more experience using the proper techniques and materials, saving you from needing to redo improper work.